

Creating a speaker drawing might seem tricky at first, but it’s actually easier than you think! Whether you want to sketch a classic speaker for a school project or draw one just for fun, this guide will help you get started. Speaker drawing is a fun way to express your creativity, and once you understand the basics, you’ll be able to make your speaker look realistic and cool.
In this article, we’ll walk you through each step to create a speaker drawing, from drawing basic shapes to adding small details that make your sketch pop. You don’t need to be a professional artist to get started—just follow along, and soon you’ll have a beautiful drawing that you’ll be proud of.
Table of Contents
Why Speaker Drawing is a Great Beginner Art Project

If you’re just starting to learn how to draw, speaker drawing is a fantastic place to begin. It might sound complex at first, but with simple steps and patience, you can easily create a detailed and fun drawing. You don’t need fancy skills or tools. All you need is some paper, a pencil, and your imagination.
Drawing a speaker also helps you practice basic shapes. Most speakers have circular or rectangular parts, making it a great way to learn how to draw straight lines and curves. It’s like putting together a puzzle with shapes! By following simple steps, you’ll be able to create something cool and feel proud of your work.
What You Need to Start Your Speaker Drawing: Tools and Materials
To get started with speaker drawing, you don’t need a lot of fancy tools. All you need is the basics: a pencil, an eraser, some paper, and maybe a ruler to make straight lines. If you want to add color, you can use colored pencils or markers. Just make sure you have the right materials, and you’re ready to begin!
One important tool is your imagination. It helps you think about how the speaker will look. Do you want it to be realistic or more of a cartoon? You can make your drawing as simple or as detailed as you like. If you have these basic materials ready, you’re all set to start your speaker drawing journey!
Step-by-Step Guide to Mastering Speaker Drawing
Now that you have your materials, it’s time to dive into your speaker drawing. First, start by drawing a basic rectangle or circle for the main body of the speaker. These are the simple shapes that will form the base of your drawing. Don’t worry about details yet—just get the main outline on the paper.
Next, add the details like the speaker cone (the round part inside) and the buttons or wires. Remember, this step is all about practice. You can make it look like a real speaker or add fun, creative touches. Keep your lines light so you can easily erase and adjust if needed.
How to Add Realistic Details to Your Speaker Drawing
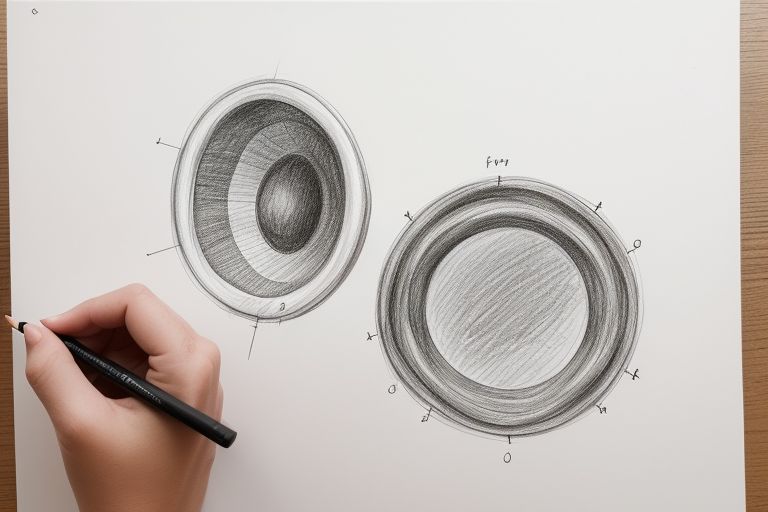
Once you’ve got the basic shapes down, it’s time to make your speaker look more real. This is where you can add depth and texture. For example, shading around the speaker cone will make it look like it’s popping out of the paper. Shading is easy—just press your pencil a little harder in the areas that would be darker, like the sides of the speaker.
Another great way to add realism is by focusing on the speaker’s details. If you’re drawing a speaker with a metal frame, you can show how light hits it by leaving some areas lighter. This will make your drawing look more three-dimensional and lifelike. Keep practicing these small touches, and soon you’ll be able to draw speakers that look amazing!
Adding Texture with Shading Techniques
Shading is important for giving your speaker drawing a more realistic look. Start by imagining where the light hits your speaker. The areas that are further away from the light should be shaded darker. Use small, soft strokes to create smooth, gradual shading. This will help your speaker look more like it has volume and shape.
Use different shading techniques, like cross-hatching or blending, to create variety in your drawing. The more you experiment with shading, the better your speaker drawing will turn out.
How to Draw Speaker Details Like Buttons and Dials
Many speakers have buttons, dials, or small details that you can add to your drawing. These features can make your drawing feel more real. Don’t rush through this part! Take your time to carefully sketch each little button and add tiny details like text on the buttons.
Common Mistakes to Avoid While Drawing a Speaker
Everyone makes mistakes while drawing, and that’s okay! But there are a few common mistakes to watch out for. First, don’t make the shapes too small or too big. If you start with a rectangle that’s too small, you won’t have enough room for the details. Make sure your speaker fits well on the page.
Another mistake is focusing too much on details too early. Remember to draw the basic shapes first, and then add the details later. This way, you’ll have a good foundation for your speaker drawing. Don’t rush through the steps—take your time to make your drawing look just the way you want.
Creative Ways to Personalize Your Speaker Drawing
Want to make your speaker drawing stand out? You can personalize it by adding some creative touches. For example, draw a unique pattern on the speaker, like stripes or polka dots. Or, you can make your speaker look futuristic by adding cool designs and colors.
You could also try drawing different types of speakers. Some speakers might have different shapes, colors, or features. By experimenting with different designs, your speaker drawing will reflect your style and creativity. It’s all about making the drawing your own and having fun with it!
Experimenting with Different Speaker Designs
Don’t be afraid to think outside the box. You can create a speaker drawing that looks totally different from others by choosing an interesting design. Maybe you want to draw a speaker that looks like a robot, or you can give your speaker a vintage look by making it look old-fashioned. The more you experiment, the better your drawing will become!
Add Fun Features to Your Speaker Design
What else can your speaker do? You can add fun features like lights, music notes, or even a cool background. Making your speaker unique is all about using your imagination. By adding different touches, your speaker will not only be drawn, but it will also tell a story!
Tips for Improving Your Speaker Drawing Skills

If you want to make your speaker drawings even better, here are a few tips to help you improve. Practice is key! The more you draw, the more you will learn about shapes, shading, and details. Don’t be afraid to make mistakes, as they are a part of the learning process. Keep practicing, and you’ll see yourself getting better with every drawing.
Another tip is to look at real-life speakers for inspiration. Studying how speakers are designed and the small details they have can help you draw them more accurately. You can also watch online tutorials or look for drawing guides to learn new techniques. Keep experimenting, and soon your speaker drawings will be amazing!
Conclusion
In conclusion, speaker drawing is a fun and easy way to get started with drawing. Whether you’re a beginner or you’ve been drawing for a while, following simple steps can help you create an amazing speaker drawing. Just remember to start with basic shapes, add details carefully, and practice shading to give your speaker a realistic look. Soon, you’ll be drawing speakers like a pro!
Don’t forget, the best part of drawing is being creative and having fun. You can make your speaker unique by adding fun designs, colors, and cool features. So, grab your pencil, and start your speaker drawing adventure today. The more you practice, the better your drawings will get, and you’ll be amazed at what you can create!
FAQs
Q: What is the first step in drawing a speaker?
A: The first step is to draw basic shapes, like a rectangle or circle, to outline the main body of the speaker.
Q: Can I color my speaker drawing?
A: Yes! Once you’re happy with the drawing, you can use colored pencils, markers, or crayons to add color to your speaker.
Q: How do I make my speaker drawing look more realistic?
A: Add shading and focus on details, like the speaker cone or buttons, to make it look more real and three-dimensional.
Q: Do I need special tools to draw a speaker?
A: No, you can start with just a pencil, eraser, and paper. If you want to add color, you can use colored pencils or markers.
Q: Can I draw different types of speakers?
A: Yes! You can experiment with different designs and shapes, like drawing vintage speakers, modern speakers, or even cartoon-style ones.


